Are you experiencing issues with your garage door not opening or closing all the way? It might be due to a malfunctioning limit switch on garage door systems. Learn how to diagnose and resolve the problem effectively.
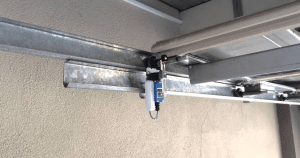
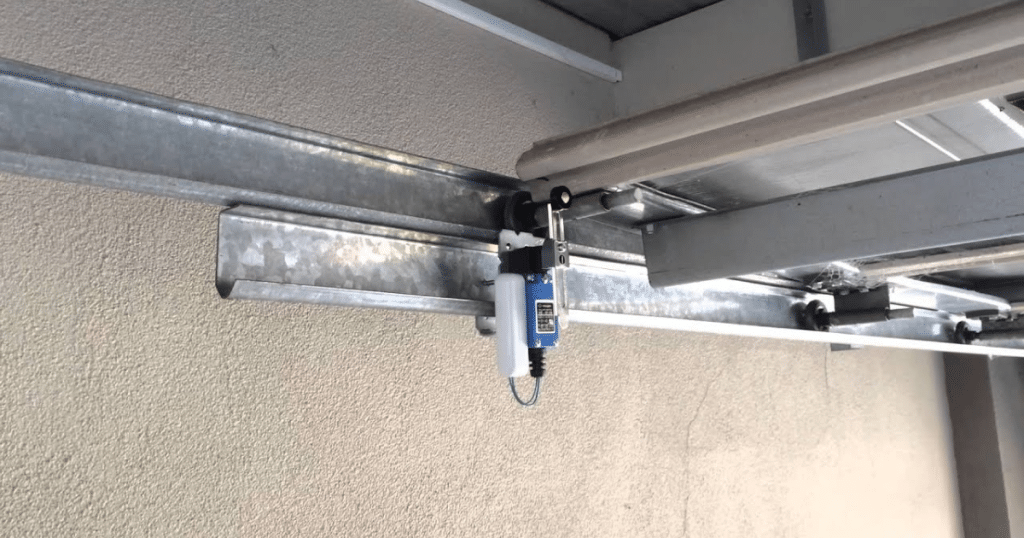
The limit switch on garage door openers is a key component that controls how far the door travels during operation. It ensures that the door stops at the correct position, fully closed or fully open, preventing damage to the system and enhancing safety.
Every automatic garage door opener is equipped with at least one or two limit switches. These switches are either mechanical (activated by contact) or electronic (based on position sensors). When they malfunction, the garage door may fail to open or close properly, reverse mid-operation, or continuously run the motor.
Understanding how the limit switch on garage door mechanisms works can save you frustration and repair costs, and even prevent unsafe conditions in your garage.
Signs the Limit Switch on the Garage Door May Be Failing
Identifying symptoms early can help prevent more serious damage. Here are some common warning signs that your garage door’s limit switch may be failing or out of adjustment:
The garage door stops before fully opening or closing
One of the most common signs of a problem with the limit switch occurs when the garage door halts before reaching the fully open or fully closed position. Rather than completing its full range of motion, the door may stop partway and remain stuck in place. This happens often because the limit switch is no longer correctly calibrated or has begun to degrade from normal wear and tear. The result is inaccurate signaling to the motor, which can cause it to shut off too soon. Adjusting or replacing the limit switch may be necessary if a garage door consistently exhibits this behavior.
The door reverses direction after reaching the floor or top limit
Another telltale symptom of a malfunctioning limit switch is when the garage door reverses direction immediately after it reaches the fully closed or open position. Instead of remaining stationary once it has completed its motion, the door may unexpectedly begin moving in the opposite direction. This kind of behavior is usually a result of the switch sending incorrect signals to the garage door opener, which can lead the system to interpret the position of the door incorrectly. Such errors can compromise the safety and functionality of the entire door mechanism.
The motor continues to run even after the door has stopped moving
When the garage door has finished moving, the motor should shut off promptly. However, if the motor keeps running despite the door being stationary, there is likely a problem with the signal that tells the motor to stop. In many instances, this issue can be traced back to the limit switch. A malfunction in the switch can result in continuous electrical input to the motor, which puts unnecessary strain on the system. Allowing the motor to run in this condition can lead to overheating, premature wear, and eventual failure of the motor or other internal components.
The motor runs, but the garage door does not move
Hearing the sound of the motor operating without any corresponding garage door movement can be a frustrating experience. In some cases, the limit switch may be stuck or set incorrectly, preventing the activation of the lifting mechanism that engages the door. This situation can also occur if the limit switch reads the door’s position inaccurately, disabling the motor’s drive system from initiating the motion. Addressing this issue often requires inspecting the switch’s positioning or reprogramming its settings to ensure proper operation.
A recent power outage or electrical surge has affected performance
A garage door may begin to behave unpredictably after experiencing a power outage, lightning strike, or electrical surge. The internal memory of the garage door opener, including the stored limit switch positions, can sometimes be erased or scrambled. When this occurs, the door might stop mid-cycle, reverse directions unexpectedly, or fail to move at all. Resetting the system and reprogramming the limit switch settings is often necessary in such scenarios. Ignoring these signs may lead to longer-term damage or erratic door behavior.
These issues often relate directly to the position or failure of the limit switch on garage door mechanisms, especially if the problem appears suddenly.
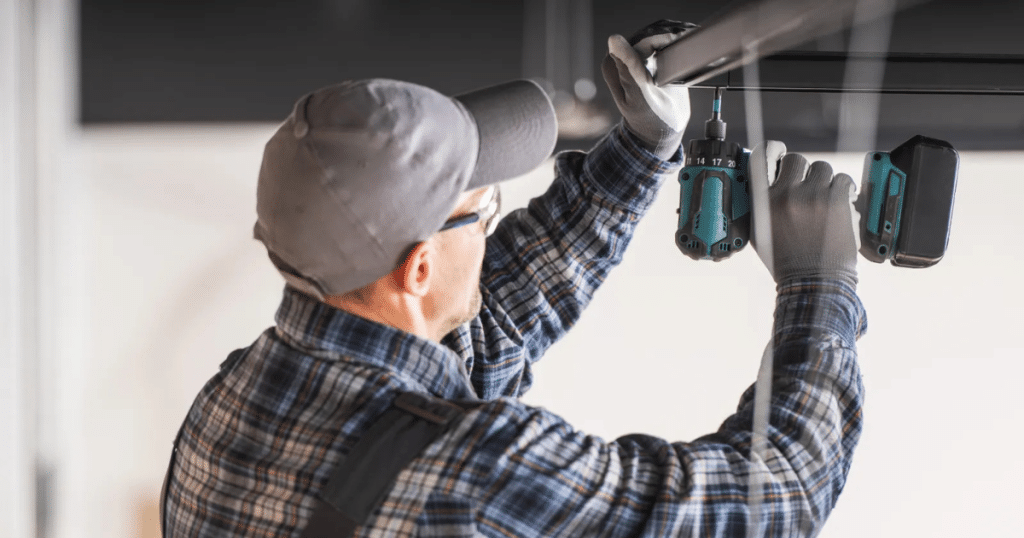
How to Adjust the Limit Switch on Garage Door Openers
When a garage door stops short of fully opening or closing, or behaves erratically, the issue often lies in the limit switch settings. Fortunately, many of these problems can be corrected with a straightforward adjustment. Most modern garage door openers come equipped with limit switch screws or dials, typically located on the motor housing. Making precise changes to these controls allows the door to operate within the correct travel range.
Before beginning any adjustment, always prioritize safety by following the proper procedures and referring to the manufacturer’s guidelines. Below is a step-by-step guide to help you adjust the limit switch safely and effectively.
Step-by-Step Adjustment Process
1. Disconnect power to the opener
Always start by turning off the power to the garage door opener. Unplugging the unit or switching off the breaker ensures a safe environment and prevents accidental activation during the adjustment process.
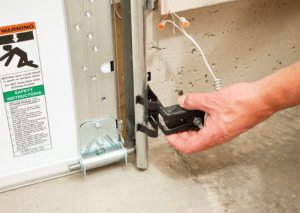
2. Locate the adjustment screws or dials
Most garage door openers feature clearly marked adjustment screws labeled “up” and “down.” These screws control how far the door travels in each direction. Depending on the model, they are usually located near the motor housing or beneath a light cover.
3. Make small, incremental adjustments
Use a flathead screwdriver to turn the appropriate screw in small increments—typically no more than a quarter turn at a time. Turning the “up” screw adjusts how far the door opens, while the “down” screw determines how far the door closes. Avoid large adjustments, as these can cause the door to overshoot its intended position.
4. Reconnect the power and test the door’s movement
After minor adjustments, restore power to the opener and operate the garage door using the remote or wall control. Observe whether the door now opens and closes to the desired positions. If the range is still incorrect, disconnect the power again before making further adjustments.
5. Repeat the process until the correct travel is achieved
Continue the cycle of small adjustments, testing, and fine-tuning as needed until the door travels smoothly and stops exactly at the fully open and fully closed positions. Consistency is key—patience during this phase helps prevent overcorrection.
Refer to the Manufacturer-Specific Instructions
Garage door opener models vary by brand and design. While the general adjustment process is similar, the exact location of screws, dials, or digital controls may differ. Always consult the user manual that came with the opener or visit the manufacturer’s website for model-specific diagrams and guidance. Following those instructions ensures compatibility and prevents accidental damage to the opener mechanism.
When to Replace the Limit Switch on Garage Door Systems
If adjusting the switch doesn’t resolve the problem or if the switch appears damaged, it may be time for replacement. Common causes of failure include:
- Electrical short circuits
- Physical damage from impacts
- Water damage or corrosion
- Wear from years of use
Replacing the limit switch usually involves removing the motor housing and detaching wires. If you’re uncomfortable with electrical work, it’s best to call a qualified garage door technician to handle the repair safely and correctly.
Preventing Future Issues with the Limit Switch
Regular garage door maintenance helps keep the limit switch and other components functioning correctly. Here are a few tips:
- Perform monthly safety checks
- Clean the opener housing to prevent dust buildup
- Check for loose wires or connections
- Avoid excessive force when operating the door manually
- Reset or test the limit settings after a power outage
Proper maintenance of the limit switch on garage door systems contributes to smooth, safe door operation and can reduce the likelihood of future problems.
Frequently Asked Questions
What triggers a limit switch?
A limit switch is triggered when a moving part, like a garage door or motor mechanism, makes physical contact with the switch’s actuator. In garage doors, the switch is activated when the door reaches a specific open or closed position.
What is the purpose of a limit switch?
The purpose of a limit switch is to control the motion range of mechanical equipment, stopping it at the correct points to prevent over-travel. In garage doors, it ensures the door stops fully open or fully closed without damaging the system.
What are the symptoms of a limit switch?
Common symptoms of a faulty limit switch include the door not opening or closing fully, stopping short, reversing unexpectedly, or making grinding noises. These signs indicate the switch may be misaligned, dirty, or worn out.
What is the limit switch on a garage door?
The limit switch on a garage door controls how far the door travels when opening and closing. It prevents the door from going too far and ensures safe and complete movement within its designed range.
How do I reset my garage door limit switch?
To reset a garage door limit switch, locate the adjustment screws or dials on the opener unit and carefully turn them to increase or decrease the door travel range. Always follow the manufacturer’s instructions to avoid damaging the opener.
Where is the garage door limit switch located?
The limit switch is usually located on the garage door opener unit, near the motor housing. On many models, it appears as small adjustment screws or dials labeled “up” and “down” or “open” and “close.”
Conclusion
When the limit switch on garage door systems stops working, it can cause noticeable operational problems. Fortunately, many of these issues can be resolved with basic troubleshooting or minor adjustments.
Understanding the symptoms of a faulty limit switch and how to address them empowers you to maintain your garage door effectively. For more advanced issues, replacement or professional service may be necessary.
Superior Door is ready to provide expert service and guidance. Whether you need a quick fix or a full repair, we’re here to keep your garage door running safely and smoothly.
End Note
Superior Door is the trusted partner for homeowners and businesses across the Omaha Metro Area. Whether you need garage door installation, garage door replacement, or expert diagnosis for a limit switch issue, our team is here to help.
We provide top-tier residential garage door services and commercial garage door services tailored to your exact needs. Check out our gallery and video gallery for proof of our quality work. Discover who we are on our About page, and connect with us on Facebook and Instagram. Use Google Maps to visit us or read our latest Yelp reviews to see why Omaha trusts Superior Door.
Superior Door
8840 S 137th Cir #3, Omaha, NE 68138, United States
+14025712999